

 DIY (Do it yourself) DIGame Kit ! Arduino IDE compatible")
 DIY (Do it yourself) DIGame Kit ! Arduino IDE compatible")
 DIY (Do it yourself) DIGame Kit ! Arduino IDE compatible")
 DIY (Do it yourself) DIGame Kit ! Arduino IDE compatible")
 DIY (Do it yourself) DIGame Kit ! Arduino IDE compatible")
 DIY (Do it yourself) DIGame Kit ! Arduino IDE compatible")
 DIY (Do it yourself) DIGame Kit ! Arduino IDE compatible")
RLX COMPONENTS s.r.o. , Electronic Components Distributor.
RLX COMPONENTS s.r.o. , Electronic Components Distributor.

ODROID-GO (Hardkernel) DIY (Do it yourself) DIGame Kit ! Arduino IDE compatible
ODROID-GO (Hardkernel) DIY (Do it yourself) DIGame Kit ! Arduino IDE compatible
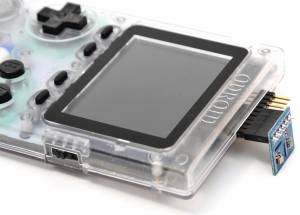
To celebrate ODROID’s 10th anniversary, we present the ODROID-GO Game Kit! It includes a special anniversary board with all the parts to put together your own game kit and see the workings behind such a device. It is not only a fun assembly project but also an educational tool to learn about all the hardware and software that goes into building such a device.
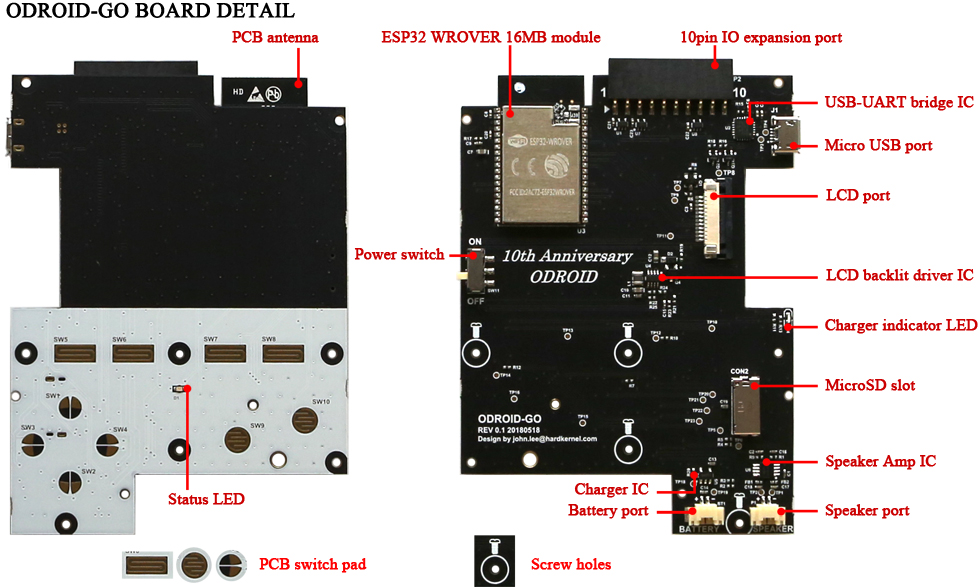
Have fun building your own handheld game kit while learning about the internal functions of each part and its purpose. Learn how each button is attached to a PCB switch pad, what materials are used, and how to put it all together to create a button control pad to play games! Learn how to connect power, speakers and how to download and install an OS. Learn why certain pieces are made of particular materials and why you need certain connectors. Since the device is clear, all the internal components and all the lights are visible.
Once you have assembled the ODROID-GO, you can download and install games. Enjoy your gaming device (that you built)!
Install Arduino and learn some basic coding. We will provide online guides to code some simple, yet cool, tasks. Then, add a weather station*, learn how to check the battery life, test the speaker, add an ultrasonic distance meter* and more.
* Parts sold separately.
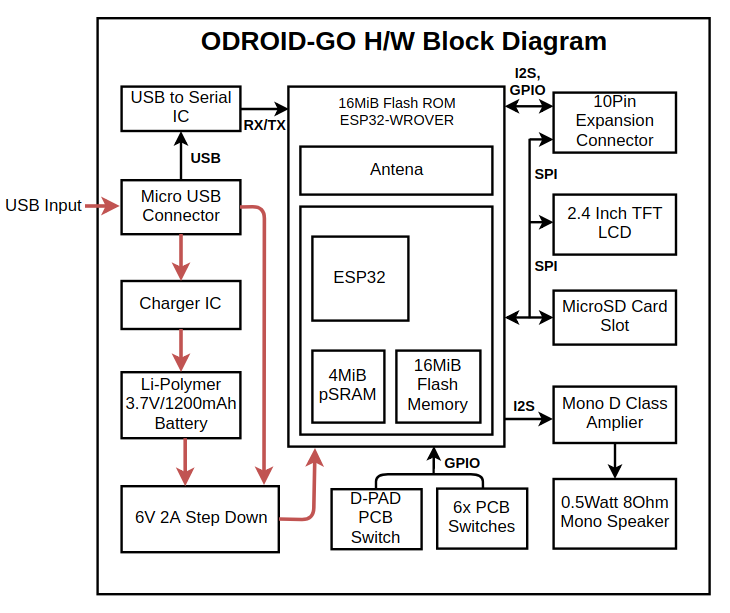
| MCU | Custom ESP32-WROVER(16MiB Flash Memory) | |
| CPU & RAM | 80MHz - 240MHz(Adjustable), 4MB PSRAM | |
| Display | 2.4inch 320×240 TFT LCD (SPI interface) | |
| Battery | Li-Polymer 3.7V/1200mAh, Up to 10 hours of continuous game playing time | |
| Speaker | 0.5W/ 8Ω Mono | |
| MicroSD card slot | 20Mhz SPI interface | |
| Expansion Port | 10Pin port : I2C, GPIO, IRQ at 3.3Volt | |
| Input Buttons | Menu, Volume, Select, Start, A, B and Direction Pad | |
| Micro USB port | Battery charging(500mA) and USB-UART data communication | |
| Size | 76x121x16mm(assembled) | |
Assembly and learning WHY : https://wiki.odroid.com/odroid_go/go_assembling
You are ready to go. Play GAMES!
Make a microSD card with your own game collections.
https://wiki.odroid.com/odroid_go/emulator/make_sd_for_importing_roms
The emulator supports
Game Boy
Game Boy Color
Game Gear
Nintendo Entertainment System
Sega Master System
CODING CAMP
Arduino Programming Camp with ODROID-GO
Day 1. Getting Started with Arduino. Download and install Arduino IDE and ODROID-GO specific libraries and examples.
https://wiki.odroid.com/odroid_go/arduino/01_arduino_setup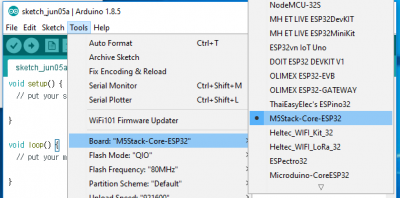
Day 2. Display “Hello, ODROID-GO” on the LCD. Let’s learn how to display a string, change colors and change font size.
https://wiki.odroid.com/odroid_go/arduino/02_hello_world
Day 3. Control LED. Let’s learn how to control the blue LED on ODROID-GO front side. Tinkering the LED with simple GPIO on/off as well as 256-steps brightness control with PWM.
https://wiki.odroid.com/odroid_go/arduino/03_blue_led_and_pwm
Day 4. Read the 12 buttons status on the ODROID-GO. Let’s learn how to read the GPIO pin status
https://wiki.odroid.com/odroid_go/arduino/04_buttons
Day 5. Read the ODROIOD-GO built-in battery voltage. Let’s learn how to access the ADC input to measure the voltage.
https://wiki.odroid.com/odroid_go/arduino/05_battery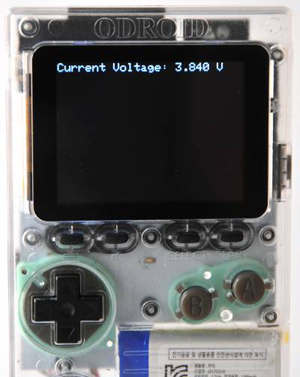
Day 6. Generate sound from ODROID-GO speaker. Let’s learn how to use the DAC output as a sound tone generator.
https://wiki.odroid.com/odroid_go/arduino/06_speaker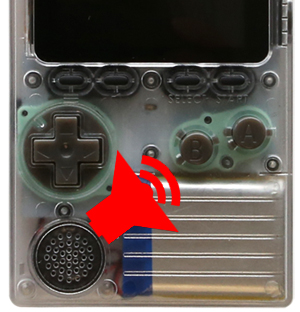
Day 7. Play your own Tetris game. Let’s learn how to make a game with a Tetris game example code.
https://wiki.odroid.com/odroid_go/arduino/33_game_tetris
Day 8. Add another LCD display. Let’s learn how to use I2C interface on the ODROID-GO IO expansion port.
https://wiki.odroid.com/odroid_go/arduino/09_16x2lcd_i2c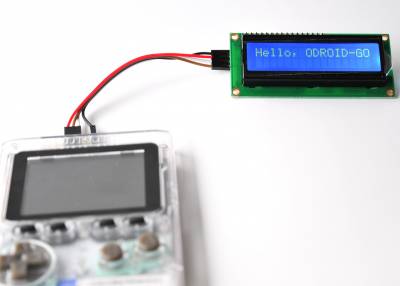
Day 9. Make a portable handheld weather station. Let’s learn how to access various weather data and share it with your mobile devices via WiFi connectivity
https://wiki.odroid.com/odroid_go/arduino/30_weather_station
* Weather Board 2 is additionally required. 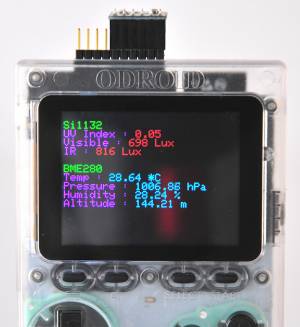
Day 10. Measure the distance with Ultrasonic. Let’s learn how to use GPIO output, IRQ input and system timer with a Ultrasonic distance measuring module.
https://wiki.odroid.com/odroid_go/arduino/31_ultrasonic_distance_meter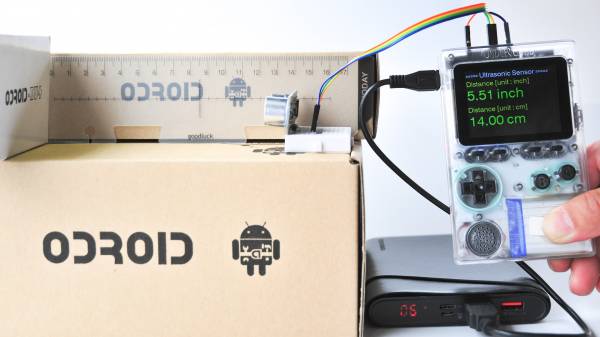
Day 11. Control the LED from your smartphone via WiFi. Let’s build a WiFi AP mode web server to blink a LED from your web browser remotely.
https://wiki.odroid.com/odroid_go/arduino/08_wifi_ap
Day 12. Serial communication over Bluetooth. Let’s make a connection bridge to your smartphone over Bluetooth RFCOMM protocol stack.
https://wiki.odroid.com/odroid_go/arduino/07_bluetooth_serial
Specific References
ODROID-GO (Hardkernel) DIY (Do it yourself) DIGame Kit ! Arduino IDE compatible